Final Fantasy 7 Remake Top Secrets VR Boss Guide
If you’re playing Final Fantasy 7 Remake and you’ve beaten the game, you’re probably gearing up to tackle the super boss, Pride and Joy, in the Top Secrets VR Mission. Everyone’s talking about Pride and Joy itself, but having defeated this encounter and received the elusive Gotterdammerung accessory, Pride and Joy is actually the easiest part of the encounter. To face it, you have to face off against a boss rush gauntlet of all the summon battles. This is where the true challenge lies.
Your reward for completing the Top Secrets VR mission and besting the Pride and Joy super boss is the Gotterdammerung accessory, which allows you to start battles with a full limit gauge and fills your limit gauge automatically over time. It is extremely powerful and will allow you to breeze through any remaining hard mode chapters.
Setup – Final Fantasy 7 Remake Top Secrets VR
To beat the gauntlet here, you’re going to want to make sure you have certain materia. You’ll notice every character has 2 HP Ups, Healing, Revival and Barrier. This is super important, especially the HP Ups and the Barriers. You cannot survive Megaflare without Manawall on every character.
Character 1 – Cloud
Weapon: Lightning + Elemental, Healing, Revival, Barrier, HP Up
Armor: HP Up
The remaining slots are up to you. I put Luck Ups in them, but I don’t think they made a difference. It’s very important to have Lightning + Elemental for when you do ultimately reach Pride and Joy, because Cloud with Lightning Elemental attacks makes him a cakewalk.
For the weapon, I prefer to use the Buster Sword since it has balanced stats and gives a nice defense bonus. For the accessory, you want Revival Earrings.
Character 2 – Barret
Weapon: Fire + Elemental, Healing, Revival, Barrier, HP Up
Armor: HP Up, Ice, Time
You want some elemental variety on this character because there are a few sections of the encounter that might require you to cast spells that target enemy weaknesses. Having the Time materia on Barret is important. You’ll want to keep Haste up on Aerith so she can fill her bar without you having to take control of her very often.
For the weapon, I prefer to use the Big Bertha since it has reasonable magic, high health and the highest attack power. For the accessory, you want Revival Earrings.
Character 3 – Aerith
Weapon: Healing + Magnify, Revival, Barrier, HP Up, HP Up
Armor: Magic Up, MP Up, Fire
It’s very important you have a Fire materia on Aerith because without it, Shiva is going to be unbeatable. Otherwise, she’s mostly your healer and support character.
For the weapon, I prefer to use the Silver Staff since it gives a hefty MP regeneration bonus and a nice HP bonus. You don’t really need the excessive magic power of the Mythril Staff for this. For the accessory, you want Revival Earrings.
Why not Tifa? Honestly, I used Tifa for the first few attempts for her ability to increase stagger damage, but there are so many flying and super mobile enemies that Barret is just positively the better choice.
Weapon-wise, try to learn Reprieve (survive at 1 HP once per battle) on every character who has it available.
Shiva – Final Fantasy 7 Remake Top Secrets VR
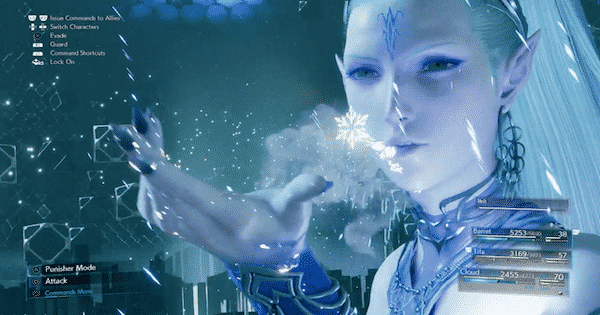
Shiva is the first threat you face in the Top Secrets VR mission in Final Fantasy 7 and she’s no pushover. She doesn’t do that much damage, though she’s very mobile and highly annoying.
The main attacks she’s capable of are an AoE damage burst around her (low damage), Blizzara/Blizzaga, an icicle barrage, Whiteout (which puts its victim to sleep and normally targets your active character), Heavenly Strike, Frost Familiars.
Each of these abilities grows more powerful the lower Shiva’s HP gets. Blizzara becomes Blizzaga, Blizzaga becomes target all, Whiteout starts shooting out 3 projectiles instead of 1, etc.
Here’s how to respond to each of these abilities:
Blizzara/Blizzaga: As soon as you see the attack name appear on the screen, block. Once the initial projectile hits you, roll away before it explodes.
Whiteout: Shiva launches a sort of ice shockwave on the ground that puts you to sleep if you get hit. The easiest way to avoid this is to just be behind her. When Shiva has high HP and she’s just launching one of them, it’s fairly easy to just roll out of the way. At low HP, she launches 3 streams that home in on you and it’s very difficult to dodge. Just switch characters immediately.
Frost Familiars: This is the really annoying one. Shiva gets 4 familiars that… probably increase her damage output in some way. It doesn’t matter. That’s not why this is annoying. It’s annoying because in order to put Shiva in a pressured state so you can fill her stagger gauge, you need to hit her with a fire spell, and each of these familiars absorbs one spell. Also, when she has these active, she heals. If you don’t deal with these right away, Shiva’s healing will easily outpace your damage and she’ll eventually be back to full health.
Heavenly Strike: This comes in 3 forms. A single icicle over one character’s head (roll away), a single icicle over every character’s head (roll away) and a series of 3 icicles over a single character’s head (roll away x3). If anyone gets hit by this they will most likely die or be in critical condition. Each icicle does a huge amount of damage (around 4000).
Diamond Dust: She telegraphs this pretty well and you have ample time to react. When you see the attack name appear on the screen, heal and set up Manawall on every character (at the very least, Aerith).
Shiva General Strategy
Basically the strategy for Shiva is to control Barret, cast Haste on Aerith, and unload bullets on her, making use of Maximum Fury whenever it’s available. Make sure Aerith has an Arcane Ward to stand on. Once you’ve whittled her HP down and raised her Stagger gauge enough, have Barret knock her down with a Firaga. While she’s down, have Cloud do a Focused Thrust x2 to increase her stagger, and have Aerith cast an Arcane Ward boosted Firaga.
The reason you don’t do this right away is because Shiva gets stronger as her HP gets lowered, and every time you take away a significant chunk, she gets more difficult. What you want to avoid here is anyone dying and losing their Revival Earrings, because you need those for later. Ideally, you only want to have to knock down Shiva twice for your first Stagger, which hopefully you can capitalize on well enough to get her to almost dead.
So, before you Stagger her, you’re trying to get her to about 75% health, so on your Stagger you can get her to about 20% health. You want to take her out in one go, because whittling her down through all her phases is a huge pain.
This is very important. Whenever she casts Frost Familiars (which she’ll most likely do after the first time she becomes pressured, at around 75% health), you have to cast 4 basic fire spells on her immediately. You can do this by having Aerith cast 2 fire spells from her Arcane ward, with Barret helping if Aerith gets interrupted. Don’t let these Frost Familiars stay on Shiva. Get rid of them immediately.
You may have to knock her down or stagger her twice. Follow the same strategy as the first time (knock her down with Barret, have Cloud 2x Focused Thrust while she’s pressured, have Aerith Arcane Ward Firaga). Do not waste a Firaga on her while she has Frost Familiars up. Having a Firaga just get casually absorbed by Shiva is one of the most frustrating things in Final Fantasy 7 Remake.
At low HP she’ll cast Diamond Dust. From that point it’s just a race to finish her off as quickly as possible.
Fat Chocobo
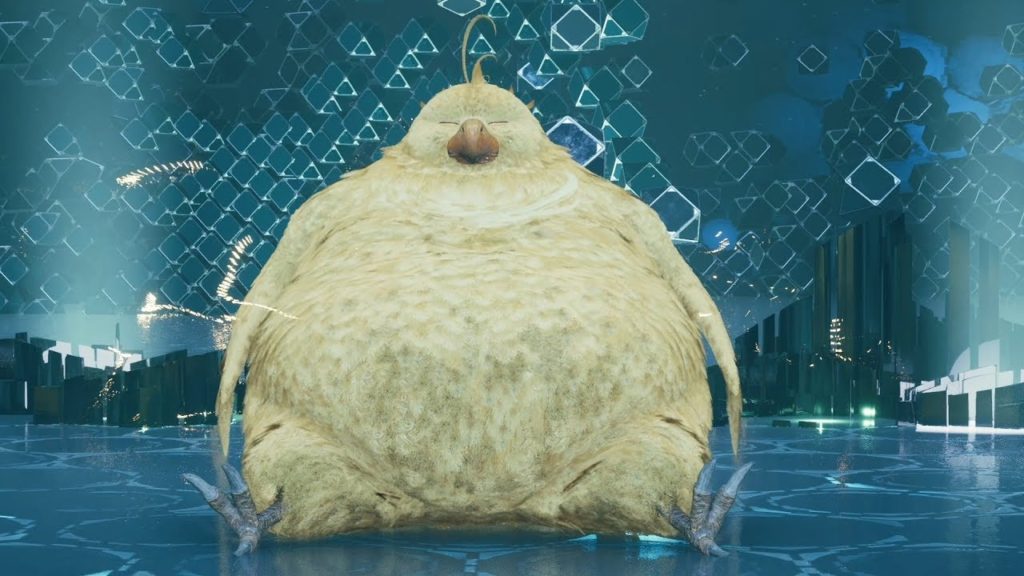
Fat Chocobo is basically just an easy boss to help you refill your HP, MP and sanity following the Shiva fight. It’s incredibly easy. His attacks are weak and slow, and when you stagger him, he stays staggered for a very, very long time.
The main thing to be aware of during this fight is that the moogles will release Tonberries. The Tonberries have low HP, but you need to make sure you take them out ASAP because just like normal Tonberries, they just walk around casually instagibbing your party members one at a time. This isn’t normally a big deal, but you absolutely do not want to lose your Revival Earrings, so you want to murder those cute little turtle psychopaths as soon as they appear.
Other than that, there is very little to fear during this fight. Just whittle him down and try to conserve MP so it’ll be back to full for the next phase.
Leviathan – Final Fantasy 7 Remake Top Secrets VR

Leviathan isn’t as annoying as Shiva, but he’s still pretty annoying. Most of his attacks are magic based. The easiest thing to do her is to take control of Barret and just shoot at it the entire time, rotating between normal attacks, Overcharge and Maximum Fury when available.
It’s a pretty standard fight for the most part. Leviathan deals moderate damage that you can easily heal through. He doesn’t have any tricks of curve balls. When he gears up for Tidal Wave, very quickly make sure Manawall is on all your characters.
Leviathan (and the next fight) are the main reasons why you want to use Barret. Leviathan has long periods where he’s out of range of melee attacks. When he gets to critical HP, he starts flying around in the air while 3 whirlpools move around the battlefield and without Barret, this phase is unbelievably irritating. What makes this phase annoying is the camera. If you lock onto Leviathan, you’re going to get hit by the whirlpools. If you don’t lock onto Leviathan, you can avoid the whirlpools, but you’ll have trouble hitting him. Barret makes finishing off this final Leviathan stage 1000x easier.
You can have Cloud cast Lightning on Leviathan every once in a while to help speed things along.
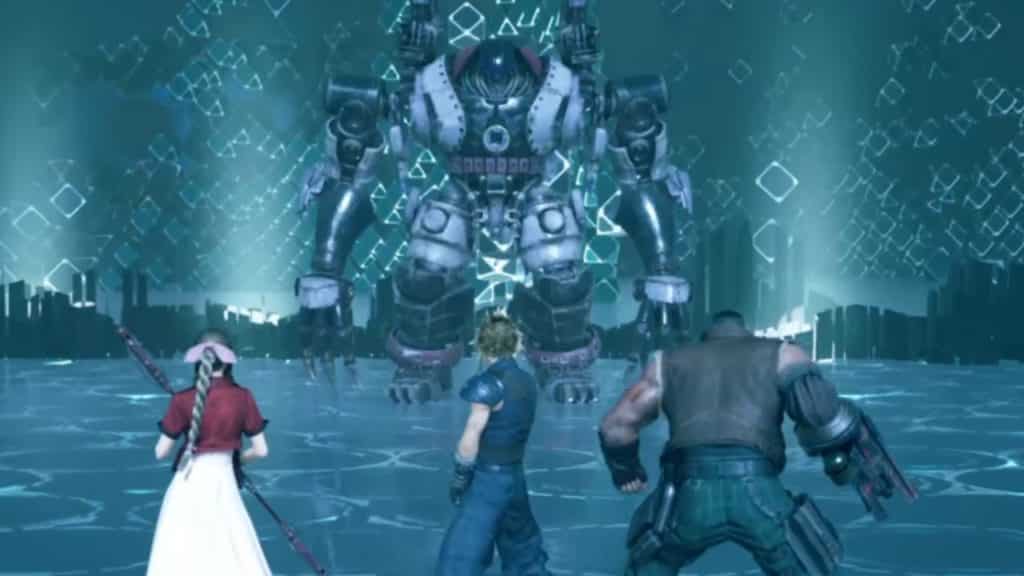
Bahamut – Final Fantasy 7 Remake Top Secrets VR

This is the game’s true super boss. There is no more difficult fight in the game than this. Why use Barret on your team instead of Tifa? This. Why equip everyone with Revival Earrings? This. Why have Barret lug around a useless Ice materia? This. Why does everyone need 2 HP Ups? This. Why Barrier on every character? This.
First of all, Barret is integral to this fight. Not only because Bahamut is a flying enemy who’s constantly moving and only 10% of melee attacks are actually going to connect, but also because Bahamut is constantly attacking and Maximum Fury is (I believe) the only significant attack move in the game that makes you immune to hitstun. Barret is the only character who can be consistently dealing damage to Bahamut without getting constantly knocked down or getting dodged.
Bahamut mostly flies around beating the shit out of all your characters, taking periodic breaks to stop in the middle of the battlefield and count down from 5 to 1. Whenever he stops, unload everything you have on him. It’s possible to pressure him during this countdown and delay Megaflare. It’s unlikely to accomplish this on hard mode, but I did it a couple of times, so it’s worth a shot.
If you ever see “Umbral Frenzy” appear on the screen, block. This is an attack sequence that’s about 7-8 hits long and if you’re not blocking, it will kill you. Umbral Strikes, where Bahamut fires off two orbs, can be dodged if you time it right. You have to roll in the direction of each orb right before it connects. So if the orb is arcing toward from from the left, dodge to the left, then dodge the next orb to the right.
When Bahamut’s countdown hits one, wait about 20 seconds and then throw up Manaward on every character and start getting very particular about staying topped off at full HP. Without two HP Ups and Manawall, Megaflare will instantly kill your entire party. If all goes smoothly, Bahamut will only have the opportunity to cast Megaflare once, but you want to be able to survive twice. The Revival Earrings are equipped so that anyone who can’t survive this will instantly revive. It’ll give you some cushion.
At half HP, Bahamut summons Ifrit. Just immediately use both Cloud and Barret’s limit breaks on it. It’ll likely still be a live with a bit of HP. Have Cloud quickly whittle it down with Punisher mode attacks and have Barret cast powerful Ice spells on it (this is the entire reason you brought that Ice Materia). You do not want Ifrit to be hanging around for more than a few seconds, I promise you.
With that, you generally have the basics down. Your main source of damage her is going to be Barret, so just keep control of Barret, deal damage constantly, use Maximum Fury whenever you can, and survive the Megaflares, and you should make it through.
Pride and Joy – Final Fantasy 7 Remake Top Secrets VR
Ah, Pride and Joy, the so-called super boss. He’s actually incredibly easy. He’s not only easier than Bahamut, he’s also easier than Shiva and Leviathan. Mildly more difficult than Fat Chocobo. Cloud is your MVP for this fight. All you really have to do is have Cloud stay behind it the entire time and whack its legs with Lightning + Elemental basic attacks.
It has a handful of attacks I could describe, but they pretty much pose no threat whatsoever. He launches missiles that make damaging lava pools on the ground. Obviously don’t stand in those. He has some very heavily telegraphed melee attacks. For the most part, you can just casually walk or roll away for a moment. Every once in a while he uses “Grasp”, which grabs someone. You can usually dodge this easily, but if he does snag someone, you can attack the arm until he lets them go or just let them die and quickly revive them. He also has a big laser that can be easily dodged.
Anyway, impotent attacks aside, just stay behind him and whack him in the legs until he’s dead. Kill him and you’ll get a nice trophy and that sweet, sweet Gotterdammerung accessory.
Anyway, that about does it for how to beat every boss in the Top Secrets VR Mission in Final Fantasy 7 Remake. Be sure to check out the Games Section for more content like this, and click here for more game guides and articles for Final Fantasy 7 Remake.